Send SMS tutorial
In this tutorial, you will create a simple application that sends a message from a GoToConnect phone number to another phone number. For example, a dental clinic might want to send a reminder to their patients before their appointment. To achieve this, you will use the GoTo Messaging REST API and Node.js (but any programming language would do).
At a high level, you will complete the following steps:
- Install any required software and set up a test phone number.
- Obtain an access token to get the authorization to send a message.
- Set up a demo application for sending messages.
- Send a test message using your demo app.
You can follow along or read the completed project.
Prerequisites
- Install Node.js (version equal to or greater than 16.14.2).
- Obtain a phone number to receive messages (for example, your personal phone).
- Obtain GoTo Phone number with SMS permissions to send messages from:
- Make sure that phone number is assigned to you in GoTo Admin under "Phone system > Phone numbers".

- Make sure that phone number is assigned to you in GoTo Admin under "Phone system > Phone numbers".
Obtain access token for authorization
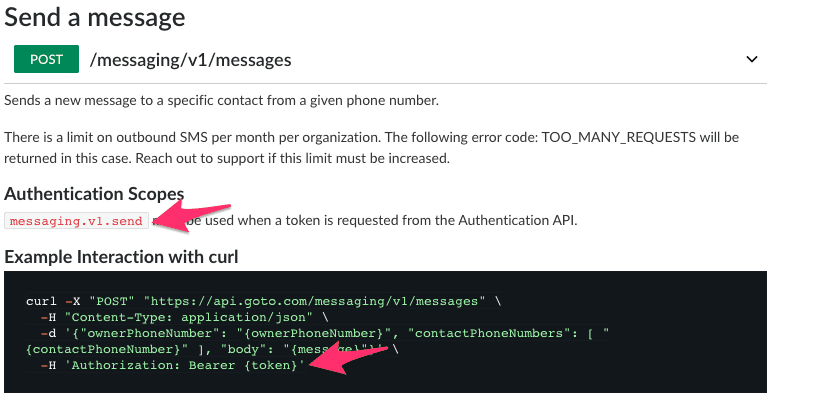
Since you want to send a message, you should first have a look at this useful snippet from the
API documentation for "GoToConnect > Message > Send a message" request.
It tells you the following: to have the authorization to send a message, you need a bearer token (access token)
with the messaging.v1.send OAuth scope:
When making API requests to a GoTo server, your application needs to prove that it has the required permissions to access GoTo data hosted on the GoTo server. GoTo servers use the OAuth 2.0 protocol to give applications access to protected data. How can you obtain access permissions?
- Create an OAuth client for your application. Your client will get a client ID and a client secret.
- When making an API request, your application will identify itself using the client ID and secret. The GoTo authentication service will validate the client ID and secret, and on successful validation return an access token. The access token can then be used in subsequent API requests, acting as proof that your application has permissions to access GoTo data.
To obtain an access token using the OAuth scope messaging.v1.send, follow the instructions in the
"How to obtain an OAuth access token (in Node.js)" tutorial.
When you have completed the tutorial, you will have a Node.js project and an accessToken variable
required for the next step.
Set up demo application to send SMS message
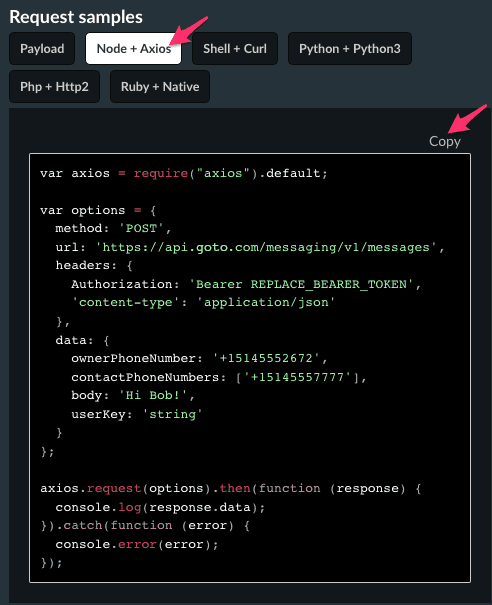
Now, you need to send a request to the API endpoint with the right headers and parameters. Luckily, the documentation provides request samples in various languages for each endpoint.
Note: The following image serves as illustration only and the actual request sample that you will be using may be different.

- Install the Axios HTTP client:
npm install axios - Go to the "Send a message" API documentation, copy the "Node + Axios" request sample, then paste it in the
app.jsfile that you created when obtaining the access token. - Replace the request parameters with your own values. They are fully documented in the "Send a message" API documentation, but here's a summary:
- Bearer token: The access token you have previously obtained.
- ownerPhoneNumber: The GoTo phone number you will send the message from.
- contactPhoneNumbers: A list of phone numbers that you will send the message to.
- body: The content of the message.
- userKey: You can omit this because you will send the message from the user of the bearer token.
 var express = require("express");
+var axios = require("axios").default;

 // ...

 app.get('/login/oauth2/code/goto', async function (req, res) {
     // ...
     var accessToken = tokenResponse.token.access_token;
+    var options = {
+        method: 'POST',
+        url: 'https://api.goto.com/messaging/v1/messages',
+        headers: {
+            Authorization: `Bearer ${accessToken}`,
+            'content-type': 'application/json'
+        },
+        data: {
+            ownerPhoneNumber: '+15145550100',
+            contactPhoneNumbers: ['+15145550199'],
+            body: 'Congratulations! You have successfully completed the tutorial!'
+        }
+    };
+
+    axios.request(options).then(function (response) {
+        console.log(response.data);
+    }).catch(function (error) {
+        console.error(error);
+    });
 });
Send SMS message: demo
-
Run the application:
node app.js -
Open the displayed authentication link in a browser.
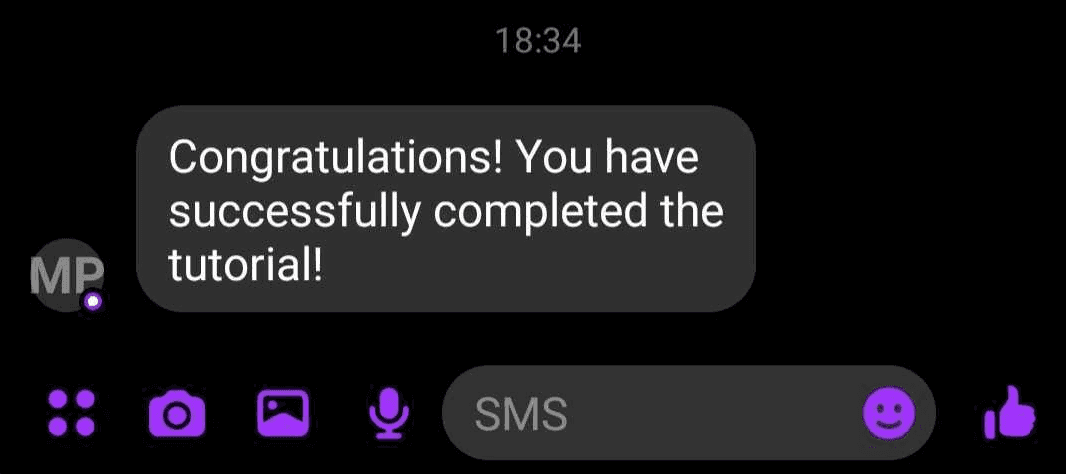
Once the message is sent successfully, you should see the following message on your phone:
Meanwhile, the response body will be returned in the terminal. The "id" field is the ID of the message that you just sent -- we can use it to retrieve the message.
As a next exercise, you could try to get the message that you just sent using its ID.
Tips for the get message exercise:
- You will need to modify your OAuth client scope by adding
messaging.v1.readin the GoToConnect scopes. - Don't forget to change the scope in the app.js file.
- You should use a valid message ID to retrieve a message. For example, you can use the message ID that you got from the previous exercise.
Trial request
If you do not have a test PBX, please request access by contacting sales here. An SMS limit may apply.
- How do I get started?
- How to create a developer account
- How to create an OAuth client
- How to obtain an OAuth access token
- How to obtain an OAuth access token (in Node.js)
- How to Obtain and Use Refresh Tokens
- Migrating to New Token Retrieval with authentication.logmeininc.com
- How to use GoToConnect API to fetch account users and lines
- How to create, update and delete account users via Admin API
- Call Events Screen Pop Tutorial
- Send SMS tutorial
- How to use Voice Admin APIs
- How to create a channel and receiving notifications from GoTo services
- How to subscribe to and get call events
- Fetching Call Events Reports
- Make and Receive Calls using the Devices and Calls API
- GoTo Connect APIs Host Migration
- GoToWebinar webhooks
- How to use GoToWebinar webhooks
- What API information is available for GoToMyPC?
- How to Setup an Integration with Central
- How to Setup an Integration with Rescue
- Rescue iOS and Andriod SDK
- Introduction
- Java SDK
- .NET SDK
- Direct login migration
- How to use Postman API collections
- How much do the GoTo APIs cost?
- How do I get support for the APIs?
- Rate Limiting


